CryptPi
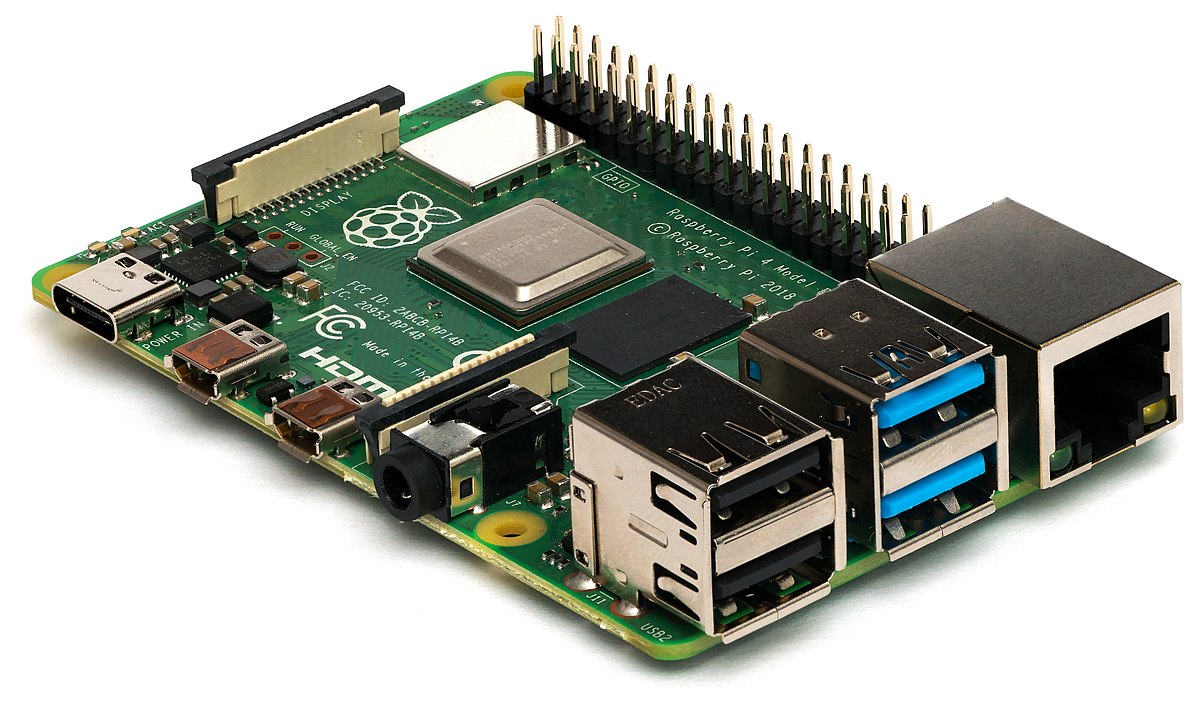
After much trial and error, I figured out how to run CryptPad on a headless Raspberry Pi 4B (2GB, version 1.2) as pictured below. The instructions on GitHub were good, but lacked detail on how to set up a CryptPad instance on anything other than a local personal computer. Furthermore, the GitHub installation guide failed to provide emphasis on some of the specifics of installation. In this installation guide, we will go command by command on how to set up and serve CryptPad on a headless, LAN connected, Raspberry Pi 4B.
Part One: Pi Setup
Step 1
It all starts with a flashed image of the Raspberry Pi 64-bit version of "Ubuntu Server 20.04.1 LTS" on a reasonably sized, blank micro SD card (8GB or more).
Step 2
Set up the Raspberry Pi on your LAN. Find the IP address of the Pi by either logging into your router and looking at connected devices, or scanning your network with nmap.
Example:
192.168.0.12
192.168.1.53
192.168.0.254
Step 3
After the IP address of the Raspberry Pi has been located, tunnel into it through SSH and follow the prompts to accept the new key and make a new password.
ssh ubuntu@[INSERT IP ADDRESS HERE]

Step 4
Make sure Ubuntu has the latest version of all it's programs. Run the following commands to make sure you are up to date.
sudo apt update && sudo apt upgrade
Part Two: Server Setup
Step 5
There are four programs that need to be installed prior to the installation of CryptPad. These programs are vital for setting up CryptPad as well as running it. Copy and paste the commands (everything after the colons).
1: sudo apt-get install git
2: curl -o- https://raw.githubusercontent.com/nvm-sh/nvm/v0.37.0/install.sh | bash
3: sudo apt-get install npm
4: npm install -g bower
Step 6
With all of the prerequisite programs installed, it's time to clone CryptPad with the following command:
git clone https://github.com/xwiki-labs/cryptpad.git cryptpad
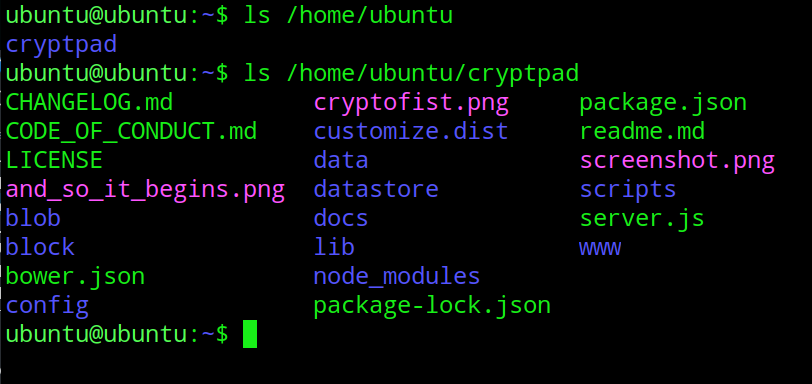
Step 7
Take a moment to look around and familirize yourself with the changes you've made. Run the following commands to see your new cryptpad directory and all of the directories and files inside.
ls /home/ubuntu
cd /home/ubuntu/cryptpad && ls
Step 8
While in the CryptPad directory, install the following dependencies into the cryptpad directory. This may seem like the prerequisites we installed in step five, but they are different and critical for all of this to work.
cd /home/ubuntu/cryptpad
npm install
bower install
Part Three: Server Configuration
Step 9
In order to make sure CryptPad is properly configured, we need to go into the directory "config" (path to directory: /home/ubuntu/cryptpad/config) and have a look around. Once in the directory "config", you'll find a file named "config.example.js".
cd /home/ubuntu/cryptpad/config && ls
Step 10
The configuration file "config.example.js" will not run. To make this work, we have to make a new copy of "config.example.js" and name it "config.js" with the cp command. This way we can modify "config.js" as much as we want with "config.example.js" as a safety net.
cp config.example.js config.js
Step 11
Make sure the new "config.js" file exists by running the ls command.
cd /home/ubuntu/cryptpad/config && ls
Part Four: Editing config.js
Step 12
The sever is almost ready to go live, however, the default configuration only allows for local access. Given that we are running this as a server, this is a big problem with an easy solution: edit our new "config.js" configuration file! To do this, we need to use a program native to Ubuntu Server called Vim. Vim will be our go-to text editor, however, Nano is perfectly acceptable.
vim /home/ubuntu/cryptpad/config/config.js
Step 13
Once in the config.js file, there will be a lot of text to look at, but the part we are concerned with first is finding a line called "httpUnsafeOrigin: 'http://localhost:3000/',". Scroll down slowly until you find this line of text. In order to edit this file using Vim, we need to press the "I" key on the keyboard to go into insert mode.

Step 14
With "httpUnsafeOrigin: 'http://localhost:3000/' ," located and Vim in "insert mode", we can now replace the "localhost" portion with the IP address of the Raspberry Pi that we found in Step Two of this tutorial.
Defult:
httpUnsafeOrigin: 'http://localhost:3000/' ,
New (Example):
httpUnsafeOrigin: 'http://192.168.0.18:3000/' ,

Step 15
After editing that line, we need to scroll down further and locate the line "//httpAddress: '::' ,". We will then delete the two slashes at the beginning and replace the colons with the IP address of the Raspberry Pi.
Defult:
//httpAddress: '::' ,

New (Example):
httpAddress: '192.168.0.18' ,

Step 16
To Save your newly edited configuration file, press the escape key (Esc) on your keyboard. Enter the following command on your keyboard and hit the enter key in order to properly save and exit Vim.
Keyboard input:
:wq (then press the enter key)
Part Five: Startup
Step 17
Go back to the cryptpad directory with this command
cd /home/ubuntu/cryptpad
Step 18
Install the process manager pm2 with this command. This will run the server in the background, allowing you to do other things on the server and close the SSH tunnel without interfering with your new CryptPad instance.
sudo npm install -g pm2
Step 19
Ensure you are in the cryptpad directory with this command:
cd /home/ubuntu/cryptpad
Step 20
Use the following command to start your very own instance of CryptPad!
pm2 start server.js
Step 21
On a LAN connected computer, open a web browser and enter the address of the Pi server (that we found on Step 2) on port 3000.
192.168.0.13:3000
192.168.1.47:3000
192.168.0.236:3000
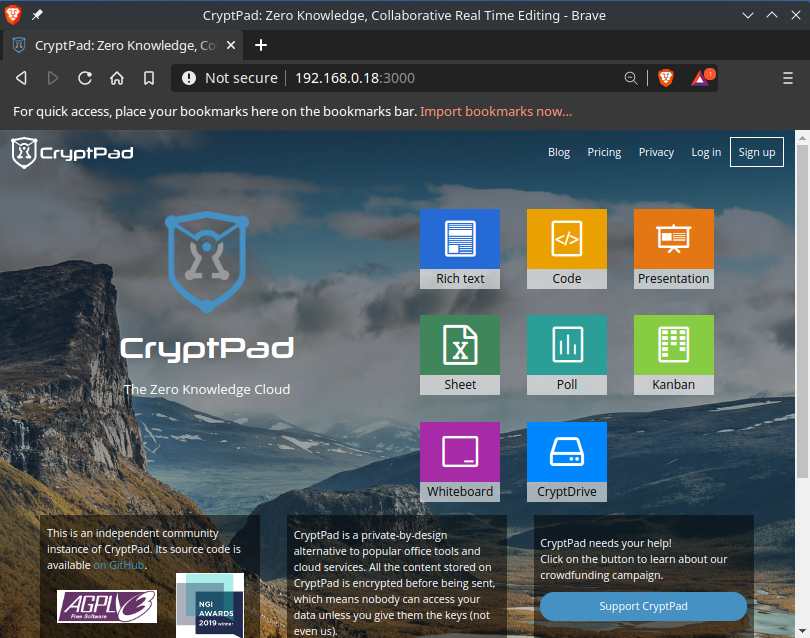
Conclusion
Thank you for reading. If all went well you should be able to access your CryptPad server at [IP ADDRESS]:3000. Eventually I'll get this up and running on a VPS, but for now, this bookshelf instance of CryptPad suits my needs. Thanks for reading and enjoy the freedoms of a decentralized internet.