Cyberdeck Build Blog
Episode 1: Wiring
05MAR 2021
About year ago at the beginning of 2020, I saw a project that involved building something called a “Cyberdeck” (which I think is based on some video game). A Cyberdeck is a self contained, portable survival computer built from off-the-shelf parts. There are many designs (which you can find with a simple Google search), but I was mostly interested in building one contained in a Pelican hard case. Building and using a Cyberdeck seemed to combine a lot of my interests: electronics, Raspberry Pi, networking, Linux, general tinkering, and a love for post-apocalyptic and Sci-Fi themed movies. After I determined that too many thoughts and configurations were floating around in my head to be considered healthy, I started buying the basic components and cannibalizing old projects. So welcome to the first installment of Cyberdeck Build Blog… a working title.
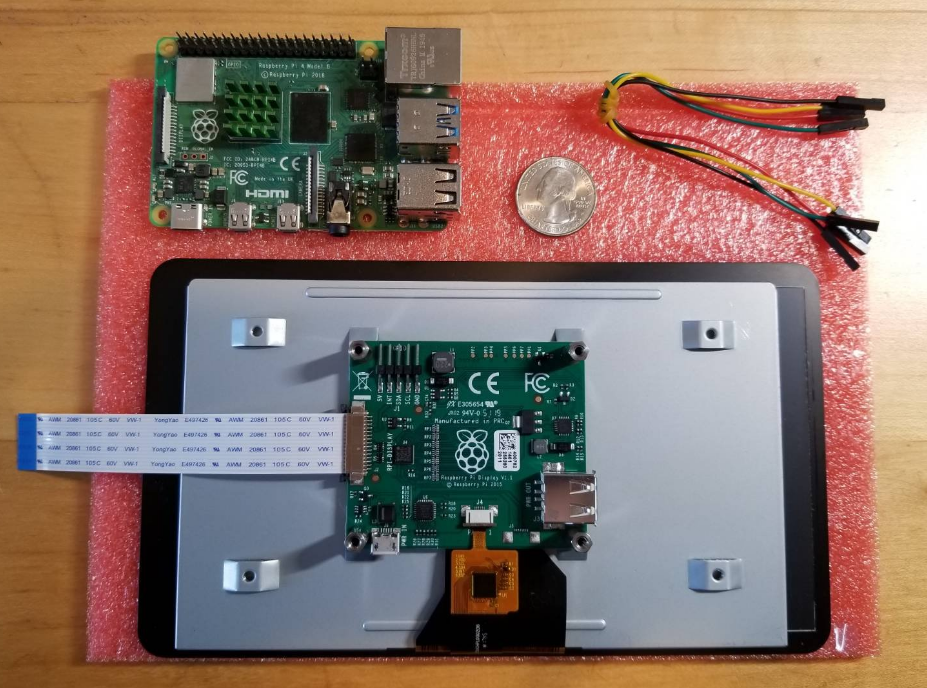
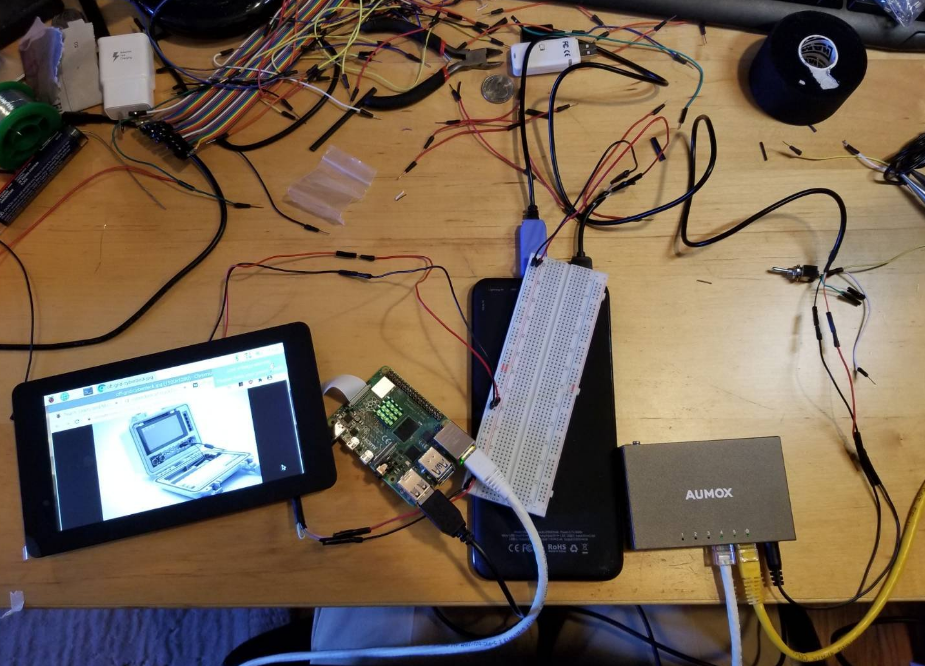
I decided to start small and just focus on the wiring. If I could get the function down then the form would be a little easier to manage rather than the other way around. In the top left corner of the image above is a Raspberry Pi 4B (2GB) with a small green heat sink on the CPU. Below that is the official Raspberry Pi seven inch touchscreen display from Element14.com. The screen is supplied data through the white ribbon cable on the left and power from two of the female-to-female jumper wires in the top right corner. My lucky quarter is there for size reference.
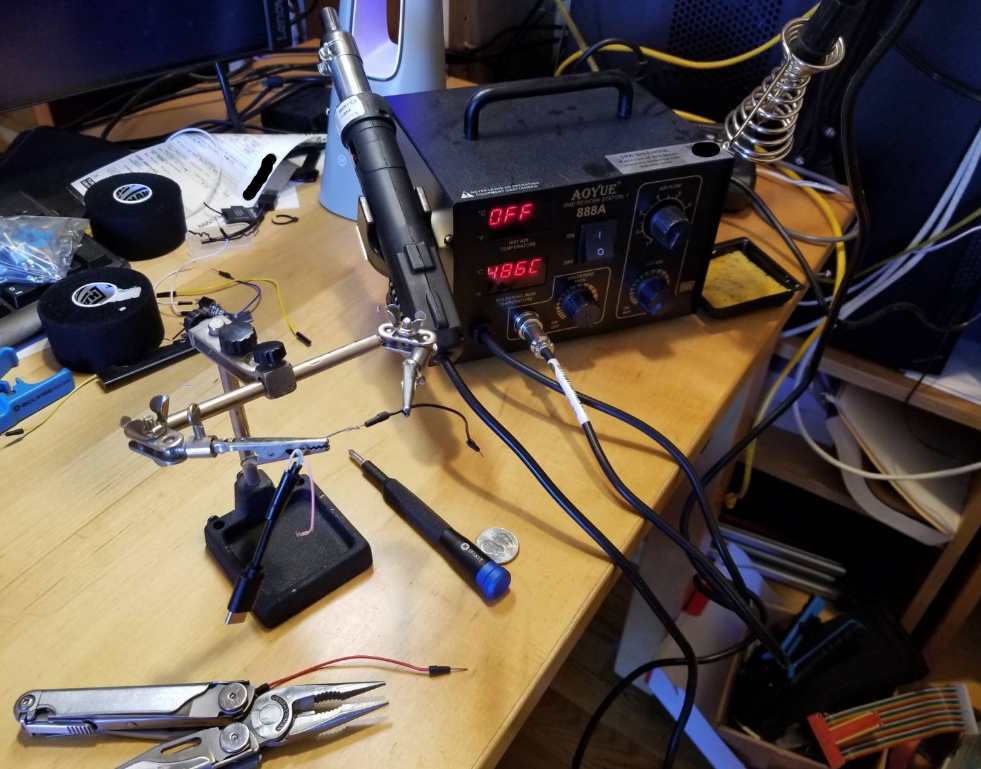
After testing everything on shore power and coming to the conclusion that the screen and the Pi worked, I started on getting everything hooked up to the 26,800mAh battery bank. I sliced, spliced, and soldered the male USB-C to male USB-A cable to some male-to-male jumper wires. Since the screen already came with female-to-female jumper wires, I just slapped on some extending male-to-male jumpers.
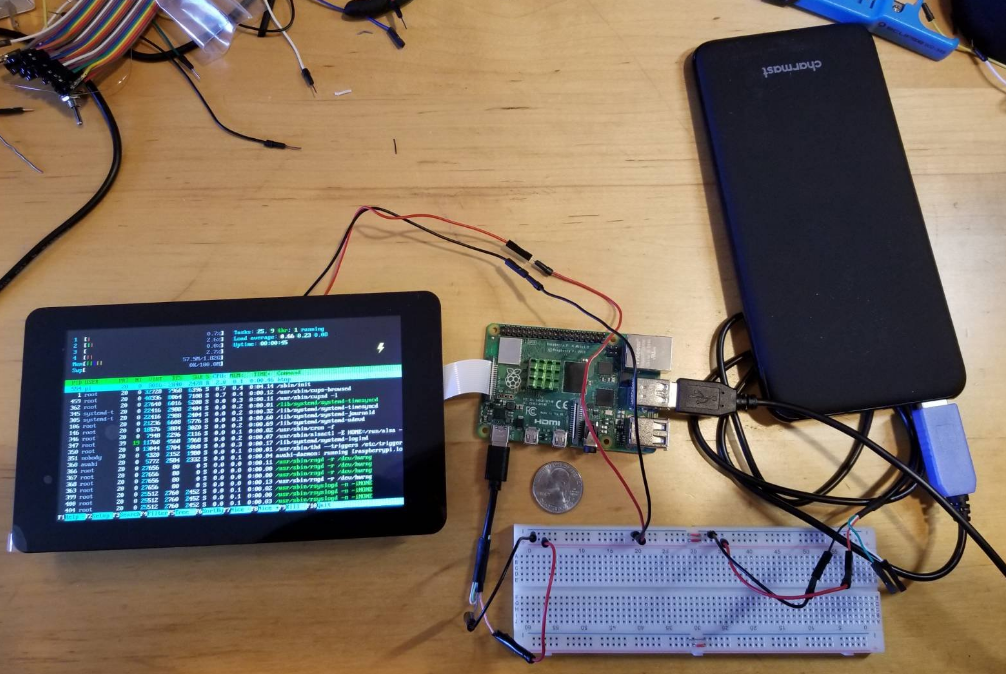
Next I plugged everything into the 5 volt rail on the white breadboard (lower right hand corner). Although it gave a continuous low voltage warning, the Raspberry Pi booted just fine. I ran the program htop to see if all system were a go. There, in the upper right corrner of the screen, you can see a yellow lightning bolt indicating low voltage.
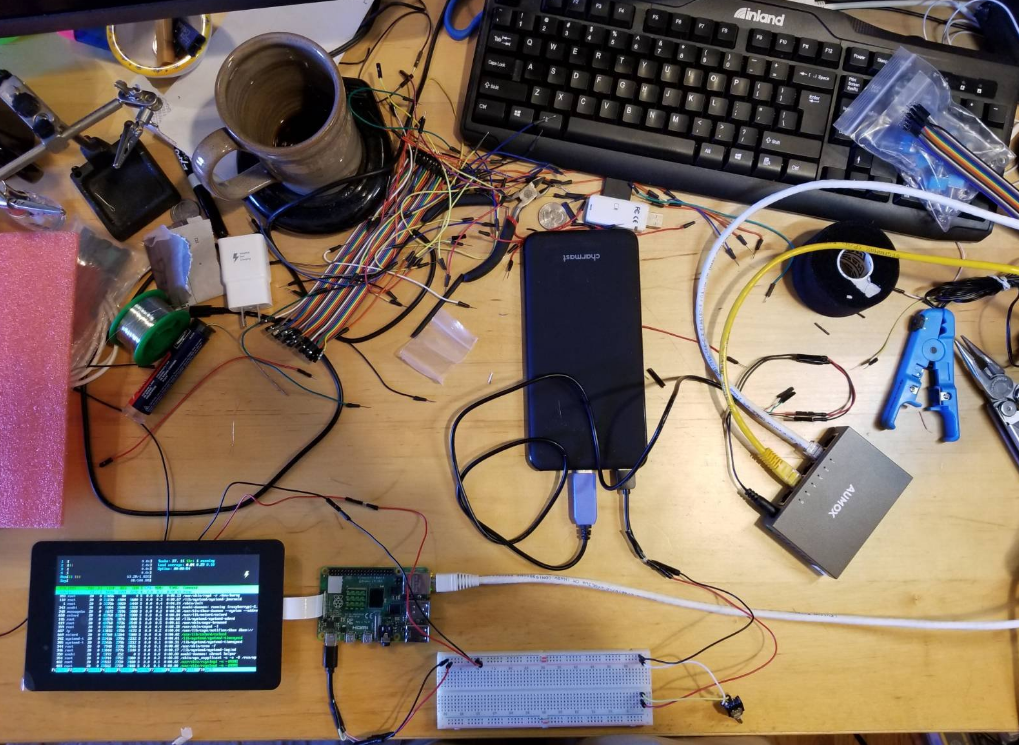
Now that I had the screen and the Pi up and running, I had to get the five port network switch working as well. As with the USB-C cable, I sliced, spliced, and soldered the barrel jack for the network switch onto two male-to-male jumper wires and plugged them into the same 5 volt rail that the screen and Pi were running off of. This, however, caused the Pi to shutdown due to low voltage. As I discovered, one USB-A port is not enough to supply power to the screen, Pi, and switch all at the same time. My workaround for this was simply using another (lower power) USB-A port to independently power the network switch while the other (higher power) USB-A port handled the Pi and screen. And just like that, it worked! For the picture above, I added a toggle switch (for Pi and screen power) and hooked up the Pi to my modem through the battery powered network switch. As pictured below, I was able to not only use the a CLI but also the GUI to browse the web for more Cyberdeck related material. (I can stop any time I want, I swear.)
This design is still in it’s early research and development stages. With the wiring mostly figured out, I can now focus on finding a way to mount it into a Pelican hard case. Since I don’t have a 3D printer, I’m thinking I can get away with using acrylic sheets and a steady hand. I’ll figure out a more permanent wiring solution when containment has been solved. For now, I can relax a little knowing that my proof of concept was a success.